


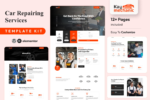

Introducing Kaymechanic, a sleek and modern solution tailored for car mechanic services, auto repair shops, and vehicle maintenance businesses. Designed for seamless customization, it features pre-built pages for services, pricing, testimonials, and contact information. With responsive layouts, user-friendly navigation, and a professional design, Kaymechanic makes it easy to showcase your expertise and attract more customers. Perfect for building a high-performance website without any coding required!
Key Features:
- Individual Elements Customization: Fine-tune elements or change fonts and colors all in one spot.
- Drag-and-Drop Visual Builder: True no-code customization with a drag-and-drop builder.
- Contemporary and Professional Design: Aesthetically pleasing and professional layout.
- Fast-Loading: Optimized for fast loading times.
- Compatible with Most Elementor Themes: Works seamlessly with most Elementor themes.
Templates Included:
- Home
- About
- Services
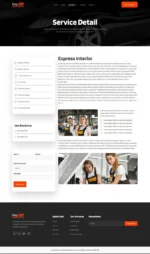
- Services Detail
- Contact
- Our Team
- Blogs
- Blog Detail
- FAQs
- Appointment
- Pricing
- Coming Soon
- 404
Sections and Blocks:
- Header
- Footer
- Contact Form
- Newsletter Form
- Appointment Form
- Hero Section Form
- Services Detail Form
Required Plugins (Pre-Installed with the Kit):
- Elementor
- ElementsKit Lite
- Happy Elementor Addons
- MetForm
How to Use Template Kits:
- Install and Activate the Digital Products Bazaar Plugin:
- Go to Plugins > Add New in WordPress.
- Install and activate the “Digital Products Bazaar” plugin.
- Download your kit file and do not unzip it. If you use Safari, ensure “Open safe files after downloading” is disabled in the browser preferences.
- Go to Settings > Permalinks and ensure Post Name is selected.
- Go to Appearance > Themes > Add New and ensure Hello Elementor is installed and activated. This will prompt you to install Elementor if you haven’t already.
- Go to Plugins and ensure Elementor and Digital Products Bazaar are installed and at the latest version. If your kit requires Elementor Pro, it must be installed now and connected to your account.
- Go to Elementor > Settings > Features Tab > Flexbox Container > Activate and then press Save Changes button.
- Go to Elements > Installed Kits and click Upload Template Kit Zip (or click your kit to view it).
- Check for the orange banner at the top and click Install Requirements to load any plugins the kit uses.
- Click import on the Global Kit Styles first. This will set up the site settings.
- Click Import on one template at a time in the order shown. These are stored in Elementor under Templates > Saved Templates and are re-used from here.
Creating Pages:
- Go to Pages and create a new page, then click Edit with Elementor.
- Click the gear icon at the lower-left of the builder to view page settings and choose Elementor Full Width and hide page title.
- Click the gray folder icon to access My Templates tab and then import the page you’d like to customize.
- The home page is set under Settings > Reading by selecting Static Front Page.
- If you have Elementor Pro, headers and footers are customized under Templates > Theme Builder.
Images Used:
This Template Kit uses demo images from Envato Elements. You will need to license these images from Envato Elements to use them on your website, or you can substitute them with your own.
Attributes:
- Support and Updates: Updates included, personalized support not included.
- File Types: HTML, CSS, JS
- Compatible With: Elementor, Elementor Pro, WPML, Bootstrap
- Compatible Versions: Tested up to version 3.10.x
- Commercial License


Reviews
Clear filtersThere are no reviews yet.